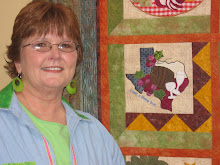
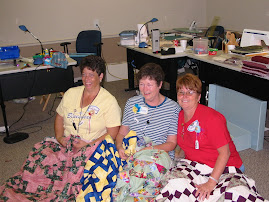
The neighborhood is growing and VERY HAPPY! I have already received two peoples swaps. They are so awesome. Below is from Carol Alberts. Are they cute or what. Love those bright colors.
Showing posts with label Happy House Swap. Show all posts
March 9, 2009
It is a Happy Neighborhood!
February 6, 2009
Happy House Block Instructions
In an effort to make it easier to access the Happy House Block instructions, I have copied them (with Lurline's permission) from Lurline's blog.
We are hoping that lots of you USA quilters will want to join the fun! Please email me to sign up and then post the swap block on your blog and link back to my blog.
These fun house blocks finish at 7.5" square (before triangle sashings) and are made completely from 2" strips, and scrap, squares!
For each house block you will need:
Roof:
(1) 2" x 8" rectangle
House:
(1) 2" x 8" rectangle
(3) 2" x 3.5" rectangles
(1) 2" square
Door:
(1) 2" x 3.5" rectangle
Window:
(1) 2" square
Chimneys:
(2) 2" squares
Background:
(5) 2" neutral squares
Sashings:
(2) 12.5" x 3.5" rectangles
Allowance for 1/4" seams has been included.
Sew your chimney squares and three of your neutral squares together as shown.
In this pic you can see that I have drawn diagonal lines across the neutral squares that will form the roof and background. It is important that you have one uphill diagonal line and one down hill diagonal line so the angles on your roof will turn out right!
Sew on pencil marks as shown!
Clip off the 'dog ear' corners, and press the background triangles out from the roof piece.
Sew units together and press neatly - now you have your little house, measuring 7.5" square.
You are now ready to add the topsy-turvy triangles! This is a little tricky as your houses will go 'uphill' and 'downhill' alternately, according to the block setting.
.jpg)
First place both 12.5" x 3.5" rectangles both right side up on top of each other. For the 'uphill' houses you want to place your ruler so that it runs DOWN HILL from upper left to lower right across your two rectangles. Use your rotary cutter to slice from lower right to upper left, corner to corner, through the rectangles.
.jpg)


.jpg)
Your blocks will be returned to you, as above - all ready to be joined together as you so desire! There will be 1/4" float around the joined houses, so you will have all your lovely litle corners intact - I would rather a float than a corner cut off - do you agree!
We are hoping that lots of you USA quilters will want to join the fun! Please email me to sign up and then post the swap block on your blog and link back to my blog.
.jpg)
For each house block you will need:
Roof:
(1) 2" x 8" rectangle
House:
(1) 2" x 8" rectangle
(3) 2" x 3.5" rectangles
(1) 2" square
Door:
(1) 2" x 3.5" rectangle
Window:
(1) 2" square
Chimneys:
(2) 2" squares
Background:
(5) 2" neutral squares
Sashings:
(2) 12.5" x 3.5" rectangles
Allowance for 1/4" seams has been included.
Sew your chimney squares and three of your neutral squares together as shown.
.jpg)
.jpg)
.jpg)
.jpg)
You are now ready to add the topsy-turvy triangles! This is a little tricky as your houses will go 'uphill' and 'downhill' alternately, according to the block setting.
.jpg)
First place both 12.5" x 3.5" rectangles both right side up on top of each other. For the 'uphill' houses you want to place your ruler so that it runs DOWN HILL from upper left to lower right across your two rectangles. Use your rotary cutter to slice from lower right to upper left, corner to corner, through the rectangles.
.jpg)
For 'downhill' houses it is going to be the opposite. Still place both your rectangles right side up on top of each other. Place your ruler the opposite way from lower left to upper right ... your ruler is going 'uphill' but the triangles will turn your houses opposite, it will be going 'down hill' by the time you sew the triangles to the block.

Lay your triangles as shown above - it is important to have the straight grain of the triangles laid against the block! 

You can see I have sewn the side triangles first and snipped off the ends! Notice how the straight grain of the fabric is against the block and the 'not quite bias' is on the outside edge. I sew the two side triangles on to the block first.

Now, this is how your blocks will be posted to me and we will accurately trim them to 10" square!
.jpg)
Your blocks will be returned to you, as above - all ready to be joined together as you so desire! There will be 1/4" float around the joined houses, so you will have all your lovely litle corners intact - I would rather a float than a corner cut off - do you agree!
Have a trial run and see how you go - once you do the first block it is easy-peasy!
As I said, please email me if you have any questions - Lurline and I look forward to a lot of Aussie and USA girls signing up. It is an easy block and will make a really cute little quilt.
February 3, 2009
Happy House Block Swap
Hey you USA Qulters, are you up for a "Happy House Block Swap". Lurline over at Lurline's Place is hosting this swap, BUT, it was only open to the Aussie Quilters due to the postage. Well, well, the USA girls want to play too!!! Sew, you are invited to come to my Happy House and lets swap bocks. I will be your USA hostess on behalf of Lurline.
Bonnie K. Hunter of Quiltville is the designer of the block and has given Lurline permission to use the pattern. Isn't it just too cute....up the hill....down the hill....and over to Grandma's House we go. Oh, I'm sorry....got a little carried away with the singing. The following is a picture of a little quilt Lurline made. Isn't it just toooo cute??????

These little blocks measure out to be 10" finished and are quite easy to make. You may find the instructions here over at Lurlines. It is suggested that you make 9-12 blocks. You will receive back the same number of blocks you send. You will mail the blocks to me (along with a pre-paid postage return envelope) way down in good ole Texas no later than April 30th and I'll swap them out and send them back to you.
If you would like to join the fun and build your own Happy Houses, please send your name, email addy, snail mail addy, and blog addy to me at kearley75860 (at) yahoo (dot) come. If you have any questions, please let me know.
Chookyblue was so nice to create the following swap button for you to put on your blog.

Sew, come on folks, get out those building tools and let's build some Happy Houses!
Subscribe to:
Posts (Atom)